


In a previous post, I discussed how to create an XML file to report on custom inventory. For simple custom data objects, the approach described in that post works fine, however, if you need to send up multiple inventory objects to the same inventory key and if you need the inventory to be reported into a location other than the Custom Data inventory tree; including placing the data into modeled data tables created by LANDESK, creating a PLIST file to collect the information is the way to go.
By default, the LANDESK inventory scanner on the Mac will read any PLIST objects found in the file “/Library/Application Support/LANDesk/Data/ldscan.core.data.plist” and report them into the database for that device. Therefore, to collect customized information from our Mac, all we need to do is write the data to the ldscan.core.data.plist file.
In the example for this post, we’re going to collect all of the local users on a Mac and report them into the pre-defined data tables used by the Windows agent to report information about the local users on the box. We will also add a completely new piece of information, a workflow status ID, that could be used for alerting down the road.
So let’s begin. Open up your favorite editor on the Mac, I’m going to use Xcode and I’m going to create a script file titled UserCollection.sh. If the typical header information isn’t added automatically by your editor, add it in.
#!/bin/sh
#  UserCollection.sh
#  This script will collect all of the local users from an OS X box and report them to the Core Server
#
#  Created by Bennett Norton on 3/28/16.
My script is going to be broken into two major parts. The first part will be to collect the information and the second part will be to manually kickoff an inventory scan.
Part 1:
The first thing I’m going to do is establish the output path as a variable. As mentioned above, we want our data to be posted to “/Library/Application Support/LANDesk/Data/ldscan.core.data.plist”
#################################################################
###   Part 1 - Create an Output File of Users on the Machine  ###
#################################################################
# Set the Output file path, do not change
outputFile="/Library/Application Support/LANDesk/Data/ldscan.core.data.plist”
Now, the downside to this plist file is that it will permanently keep all of the values placed in it, even if they no longer are applicable. As such, I’ve written some detection logic to see if the file exists, make a backup if it does, and then delete the entire file.
Deleting the ldscan.core.data.plist file may not be a best practice in all scenarios. If you have plans to write more than one custom data collection script, all of which that will be writing their information to this file, it might be better to edit the PLIST file and remove the data unique for your specific script, rather than deleting the entire file.
If editing the PLIST sounds challenging, all hope is not lost. On the LANDESK Core server, we’ll model all of our custom data we’re sending up, so that it does not get erased when a scan is sent up without that specific data from the Mac. This piece will require the Data Analytics license on the Core. If you don’t have Data Anatlyics, you’ll have to bust out your SQL skills to change the persistent data flag to 99.
# Detect if there is an existing plist file, make a backup and delete the original to ensure clean data is sent up
# If you have multiple different custom scripts, you may not want to delete this plist file
if [ -e "$outputFile" ]
then
 cp "$outputFile" "$outputFile.old"
 rm "$outputFile"
fi
Alright, now to the fun part. Mac OS X has a built in command to list all of the local users on the system. This command is “dscl . list /users” and we’ll write the output results of that command to an array. The only downside to this command is that it will return more data than what you bargained for. Every single built-in Unix account will also be returned in addition to the accounts you care about. To clean up the data, we’ll use ‘SED’ to remove all of the unwanted data.
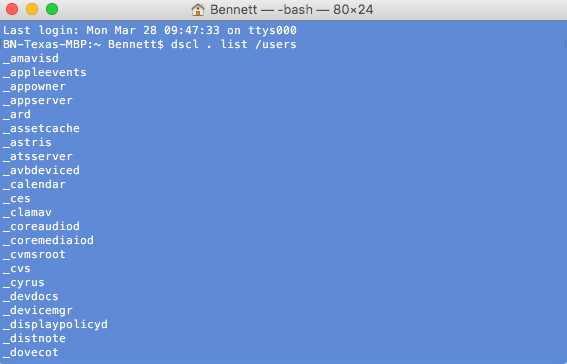
# Create array of Users
# grep -v false removes
# sed removes any accounts beginning with _, deletes all text after the first space and removes the root account and the .^ $/d deletes all blank lines
userArray=( $( dscl . list /users shell | grep -v false | sed 's/_.*//' | sed 's/root//' | sed 's/ .*//' | sed '/^$/d' ) )
With our array of users created, we just need to build our PLIST file and write the outputs from our array to the appropriate location into the LANDESK inventory tree. If you have another script that has already built the PLIST file, you can just add in the appropriate values. This example will assume you’re going to start the PLIST file from scratch.
You’ll notice that each echo output needs to be directed to our output file. Don’t forget to add your output path variable you created above.
# specifying the plist structure
# you won’t need to change any of these options, just copy them into your script
echo '<?xml version="1.0" encoding="UTF-8"?>'  >> "$outputFile"
echo '<!DOCTYPE plist PUBLIC "-//Apple//DTD PLIST 1.0//EN" "http://www.apple.com/DTDs/PropertyList-1.0.dtd">' >> "$outputFile"
echo '<plist version="1.0">' >> "$outputFile"
echo "<dict>" >> “$outputFile"
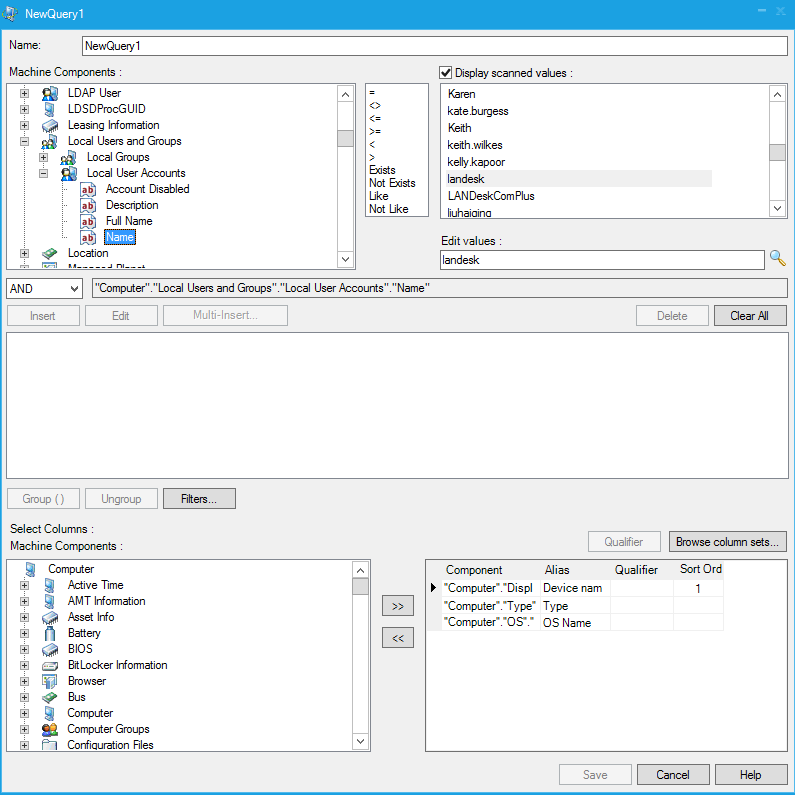
The next step is where all of the magic happens. We want to write all of the values from our array into a specific inventory key. For our example, we’re going to write each user into the Local Users and Groups – Local User Accounts – Name key. You’ll want to model your data after the inventory tree of your interest. Use a dash “-“ to separate the levels. If you are unsure what the exact key is that you want to write to, you can always create a query and browse from the available keys displayed. In the screenshot below, you can see that for Local Users and Groups – Local User Accounts there are 4 modeled keys, Account Disabled, Description, Full Name and Name.
Writing this data to your key can be a bit tricky. If you’re going to have more than one value being written to your key, “name” in our example, we somehow need to differentiate it so that the LANDESK inventory service doesn’t overwrite the value with each subsequent item in the array. At the same time, we don’t want to have unique column in the database for every custom item or again in our case, account name on the Mac.
To handle multiple values per key, the LANDESK inventory service can be fed values in a (key:uniquevalue) format. When the inventory service is given data in such a format, the unique value after the colon “:” will be fed into the defined key written prior to the colon “:”.
We’ll automate the process by iterating over our array in our script, but for the sake of discussion, let’s assume our userArray contains four names, Dave.Miller, Max.Lewis, LANDESK and Guest.
If we want the unique names of Dave.Miller, Max.Lewis, Guest and LANDESK to be written to the Name column in the database, yet be unique, we would create our custom data string to be Local Users and Groups – Local User Accounts – (Name:Dave.Miller), Local Users and Groups – Local User Accounts – (Name:Max.Lewis), Local Users and Groups – Local User Accounts – (Name:Guest) and Local Users and Groups – Local User Accounts – (Name:LANDESK).
When viewed in the inventory tree from the LANDESK console, Name: will not be displayed, only Dave.Miller, Max.Lewis, Guest and LANDESK, yet within the database, you’ll find each object in the Name column.
We subsequently need to add the attributes related to the key we just created. You may have multiple attributes to add per key value. In our example, I’ll just add a “Name” attribute with the corresponding value. The command we ran for dscl doesn’t allow us to pull additional information such as description, whether the account is active, etc. but your situation may necessitate multiple attributes for your primary key.
To do this programmatically, we’ll use a for loop to pull each value from the array and write it to a temporary variable “i.” We’ll define the key we want to use in the first echo output and then put the value in the second echo output.
# Write the names to the primary key
for i in "${userArray[@]}"
do
 echo "<key>Local Users and Groups - Local User Accounts - (Name:$i) - Name </key>"  >> "$outputFile"
 echo "<string>$i</string>" >> “$outputFile"
done
Now, not all of your attributes are going to be data strings. In your script, you may want to replace <string>value</string> with another element, such as date or an integer value. See this Apple document for additional information.
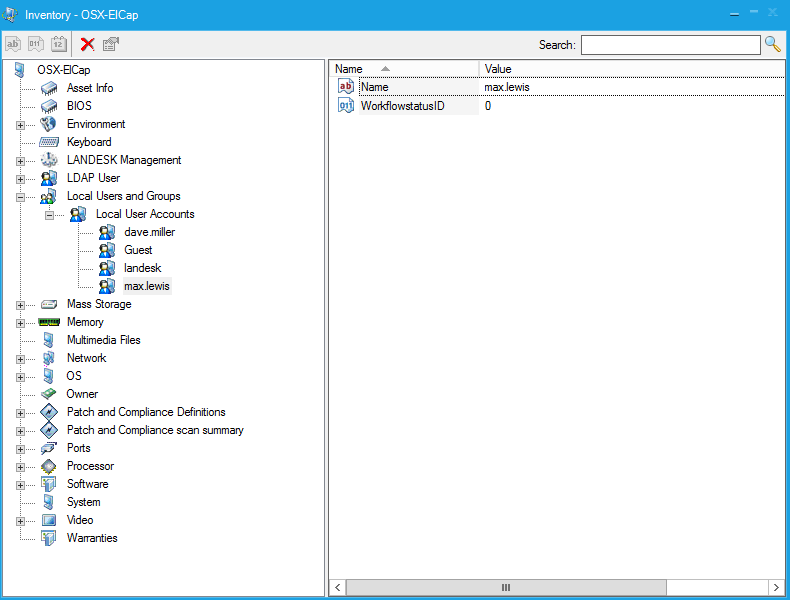
For example, if I wanted to use LANDESK Process Manager to alert me whenever it finds a Guest account, I could send up an integer value to a new attribute called WorkflowstatusID in addition to the name value. That way, I could have LPM change the default value of 0 to 1 so that I would know an email alert had been sent.
In this scenario, my for loop would be slightly different than the first one as I’ll be creating that second attribute.
# Write the names to the primary key
for i in "${userArray[@]}"
do
 echo "<key>Local Users and Groups - Local User Accounts - (Name:$i) - Name </key>"  >> "$outputFile"
 echo "<string>$i</string>" >> “$outputFile"
 echo "<key>Local Users and Groups - Local User Accounts - (Name:$i) - WorkflowstatusID </key>"  >> "$outputFile"
 echo "<integer>0</integer>" >> "$outputFile"
done
When you’ve finished adding in your attributes and values to your key, we just need to close out the PLIST file by terminating the dictionary and plist elements we’ve been writing to.
# close out the plist structure
echo "</dict>" >> "$outputFile"
echo "</plist>" >> “$outputFile"
Part 2:
The next part of the script is totally optional. To speed up the reporting, I’ll have the script kick of an inventory scan with the software scan switch and the force a sync scan.
#################################################################
###   Part 2 - Force an Inventory Scan to Run                 ###
#################################################################
# -e forces a hardware and software scan and -s forces a sync
# this step is optional
/Library/Application\ Support/LANDesk/bin/ldiscan -e -s
And that is it. Your script is finished. To simplify the copy and paste aspects for you, the entire script is available below:
#!/bin/sh
#  UserCollection.sh
#  This script will collect all of the local users from an OS X box and report them to the Core Server
#
#  Created by Bennett Norton on 3/28/16.
#
#################################################################
###   Part 1 - Create an Output File of Users on the Machine  ###
#################################################################
# Set the Output file path, do not change
outputFile="/Library/Application Support/LANDesk/Data/ldscan.core.data.plist"

# Detect if there is an existing plist file, make a backup and delete the original to ensure clean data is sent up
# If you have multiple different custom scripts, you may not want to delete this plist file
if [ -e "$outputFile" ]
then
  cp "$outputFile" "$outputFile.old"
  rm "$outputFile"
fi

# Create array of Users
# grep -v false removes
# sed removes any accounts beginning with _, deletes all text after the first space and removes the root account and the .^ $/d deletes all blank lines
userArray=( $( dscl . list /users shell | grep -v false | sed 's/_.*//' | sed 's/root//' | sed 's/ .*//' | sed '/^$/d' ) )

# specifying the plist structure
# you won’t need to change any of these options, just copy them into your script
echo '<?xml version="1.0" encoding="UTF-8"?>'  >> "$outputFile"
echo '<!DOCTYPE plist PUBLIC "-//Apple//DTD PLIST 1.0//EN" "http://www.apple.com/DTDs/PropertyList-1.0.dtd">' >> "$outputFile"
echo '<plist version="1.0">' >> "$outputFile"
echo "<dict>" >> "$outputFile"

# Write the names to the primary key
for i in "${userArray[@]}"
do
  echo "<key>Local Users and Groups - Local User Accounts - (Name:$i) - Name </key>"  >> "$outputFile"
  echo "<string>$i</string>" >> "$outputFile"
  echo "<key>Local Users and Groups - Local User Accounts - (Name:$i) - WorkflowstatusID </key>"  >> "$outputFile"
  echo "<integer>0</integer>" >> "$outputFile"
done

# close out the plist structure
echo "</dict>" >> "$outputFile"
echo "</plist>" >> "$outputFile"

#################################################################
###   Part 2 - Force an Inventory Scan to Run                 ###
#################################################################
# -e forces a hardware and software scan and -s forces a sync
# this step is optional
/Library/Application\ Support/LANDesk/bin/ldiscan -e -s
Once you have your script created, you’ll want to save it and modify it for execute permissions. Do this by opening Terminal and running “sudo chmod +x /path/to/your/file.sh”
Execute your script and validate your PLIST output file. You can execute the script by opening Terminal and running “sudo /path/to/your/scriptfile.sh”
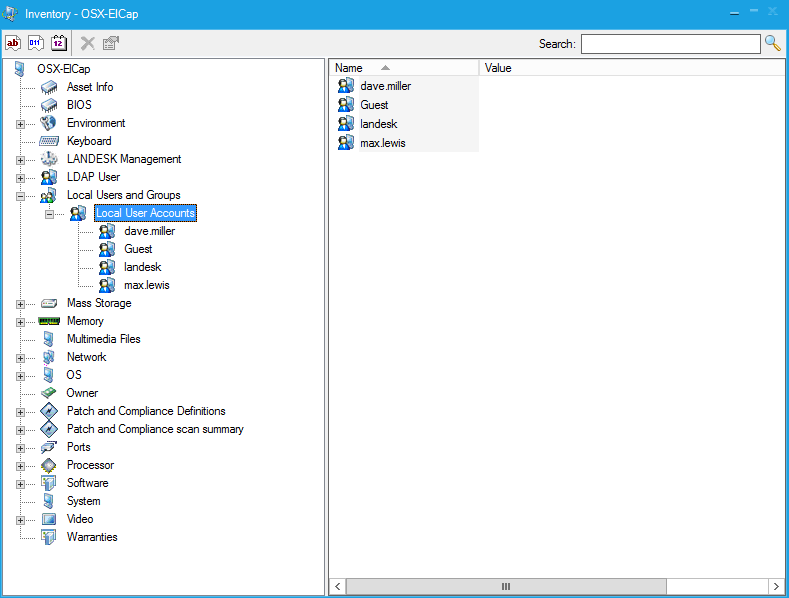
When the script terminates, go to “/Library/Application Support/LANDesk/data/ldscan.core.data.plist” and check for your custom data. You should see everything neatly arranged into your newly created PLIST file.
Now, depending on where you’ve written your data into the Inventory tree, your data may or may not have populated into the database the first time your script runs. The reason for this, is because by default, the LANDESK inventory service blocks all unknown data items. To turn this feature off or to just approve your custom items, see the following community article: https://community.landesk.com/support/docs/DOC-7456.
In our example above, the Local Users and Groups – Local User Accounts – (Name:$i) – Name is a standard key within the LANDESK database, so it will not be viewed as “custom data” and should be processed without issue. However, Local Users and Groups – Local User Accounts – (Name:$i) – WorkflowstatusID is custom and therefore it will be blocked until approved.
After you approve your unknown items, run your script a second time and check the Inventory tree now. You should see all of your approved data.
For unmodeled data that has been approved, unless a change is made to the database storing that data, it will be erased if an inventory scan is sent up with information regarding your custom object. This is probably not ideal in most scenarios. To prevent a blank value overwriting an existing value, you’re going to need to “model” the data. See https://community.landesk.com/support/docs/DOC-34424 for detailed steps on how to do this.
With the backend properly configured, you’re now ready archive your script, to prevent the permissions from being messed with by Windows ,and then copy it to your package server.
You now just need to create a package, a task and deploy it to your Macs. If you want the script to run repeatedly, set the task to execute on a recurring basis.


Recent Comments